EDIUS Pro provides a simple alternatives to the industry leaders, but it has all of the tools that other professional video editing software has such as powerful tools, enhanced timeline, advanced multicam support, 64-bit processing. One peculiarity that sets EDIUS Pro apart from others is that it doesn’t utilize GPU acceleration for rendering, transcoding and exporting videos. And this is a big advantage over other applications that require time and processing capacity to render footage.

Hot search: MKV to EDIUS Pro 8 | GoPro MP4 to EDIUS Pro 7 | AVI to EDIUS 7/7.01 | Panasonic DVCPro HD MXF to EDIUS Pro 7 | H.265/HEVC to EDIUS 5/6/7/8
“Hello everyone, the past 3 months I tried to collect some money to buy a new camera the Sony a58 which records in AVCHD, long story short I want to know the best project settings and render format in order to edit them in EDIUS 6 and get the best quality out of my videos. Any suggestions about converting AVCHD to EDIUS 6 is appreciated!”
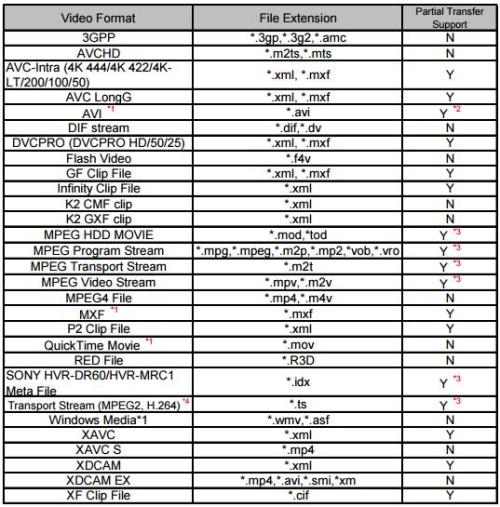
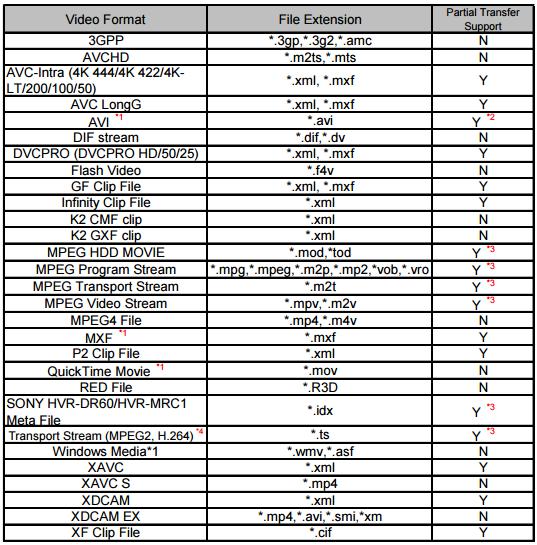
EDIUS Pro supported format for file import:
Since EDIUS lacks GPU acceleration for transcoding AVCHD video files, you will need to employ a third-party application to perform the video codec transcoding process for you. After multiple testing, I foundPavtube Video Converter is the best option. It is able to convert AVCHD to EDIUS 6 friendly format easily with the best video quality. Besides AVCHD, this video convert program can also help to convert between any popular video and audio formats as you need. Plus, with the built-in video editing feature of the program, you can trim, crop, add watermark and more to your video files.


Other Download:
- Pavtube old official address: http://www.pavtube.com/video_converter/
- Amazon Download: http://download.cnet.com/Pavtube-Video-Converter/3000-2194_4-75734821.html
- Cnet Download: http://download.cnet.com/Pavtube-Video-Converter/3000-2194_4-75734821.html
How to import AVCHD to EDIUS 6?
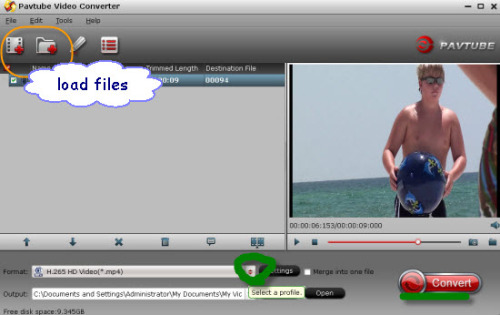
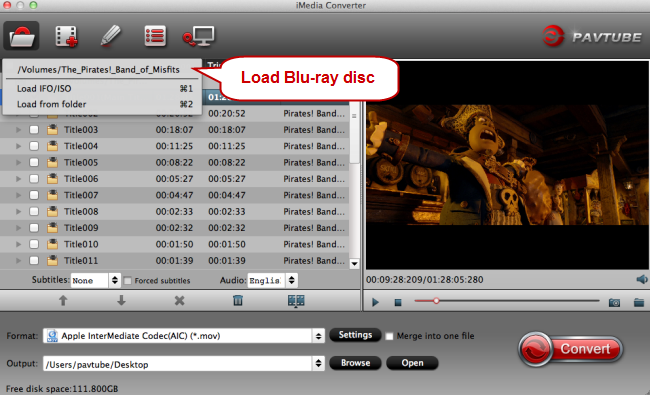
Step 1: As soon as you download and install the program, launch it and when the main interface pops up in front of us, just click the “Add Video” or “Add from Folder” to let in.

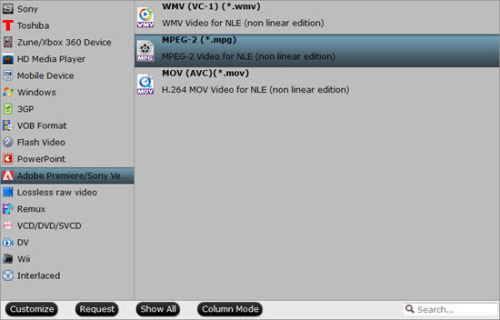
Step 2: Click the drop-down list in the format line to get the format box. Then choose “Adobe Premiere/Sony Vegas>>MPEG-2 (*.mpg)” as output format.

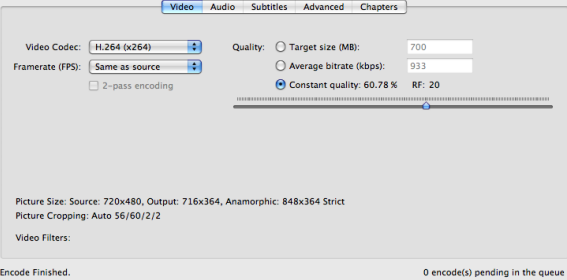
Step 3: Click “Settings” button to customize the output video and audio settings by yourself. But if you are not good at it, you’d better use the default parameters, they will ensure you a good balance between file size and image quality basically. You can change the resolution, bit rate, frame rate as you need.
Step 4: After that, click “Convert” to start AVCHD to MPEG-2 conversion.
Conclusion: After conversion, you can get the generated files by clicking “Open” button. Now, you’ll get no troubles in editing AVCHD files in EDIUS 6.
More
Can I play Sony XDCAM EX MP4 video with QuickTime
Watch ISO Movies in 3D With Nvidia 3D Vision?
Get TiVo shows onto your Android for viewing
Merge/Join hard drive camera recored MTS videos into one
Edit Samsung NX1 H.265 in Premiere Pro CC on Mac
Best Canon MXF Converter : Ingest Canon MXF into FCE
Convert DJI Inspire 1 4K Files to 1080p for Editing on Mac/PC
Transfer Sony XDCAM footage to QuickTime MOV on Mac
Src
Edit AVCHD in EDIUS 6 | AIC Converter-Import AVCHD